Precise details:
Features:
1. Using 1.6mm thickness military-grade PCB design, copper thickness 2OZ, large current and good heat dissipation;
2. Four 9025 cooling fans;
3. Use custom oversized high-power heat sink to ensure the heat dissipation of the MOS tube;
4. The output terminal uses 12 M4 copper poles in parallel, in addition to the heating coil, it can be connected to a high-voltage package or a high-frequency transformer, etc.;
5. Using 10 original IRFP260 and 24 original BM capacitors in parallel resonance, high power and high efficiency;
6. This product can work continuously for a long time when the heat dissipation conditions reach the standard.
7. The integrated design of power meter and control system is adopted, which is convenient to use;
8. Integrated control to avoid complicated wiring;
9. The heating ring is wrapped with heat-resistant thermal insulation material to prevent short circuits during heating;
10. Add a digital current overload protection switch, once it is overloaded, it will automatically cut off the heating protection circuit in time;
11. The color LCD screen displays the various working parameters of the system, including voltage, current, power, temperature and capacitance of the mainboard, etc., and can be easily switched between Chinese and English with one key. The maximum allowable power can be set by the power meter, and the maximum work can be exceeded during work. The power immediately enters the overload protection mode.
12. Button control, and external foot control, convenient for different scenes.
13. The water cooling system is protected against water shortage.
Parameter:
1.Size: 307*210*96 (unit mm)
2.Working voltage: 12-48V
3.Maximum working voltage: 48V
4.Maximum working power: 5000W
5.Maximum working current: 100A
6.Inner diameter of heating ring: 60mm/70mm
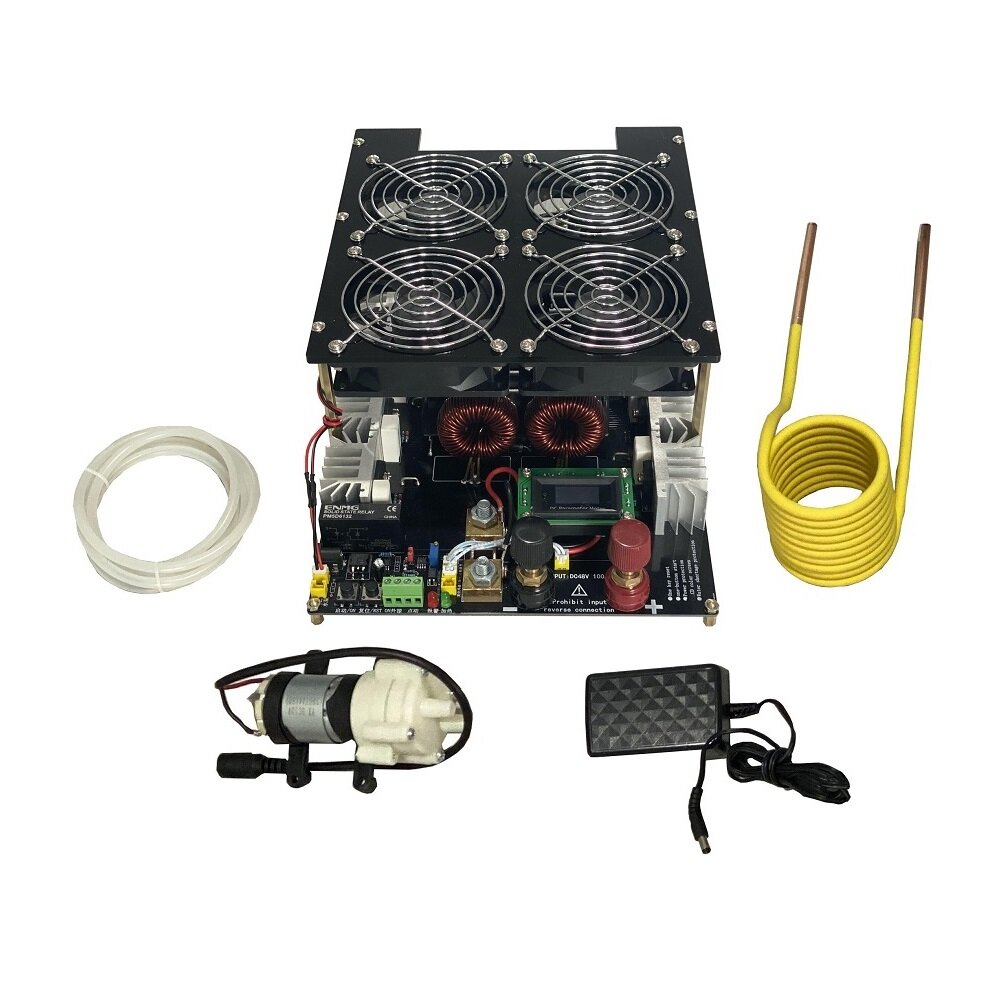
Package included:
Type 1: main board + heating ring +water pump + 12V2A power supply
Type 2: Main board + heating ring + 70ml crucible + water pump + DC12V2A power supply
Type 3: motherboard + heating ring + 70ml crucible + water pump + DC12V2A power supply + DC48V3000W power supply *2
Type 4: main board + heating ring + 150ml crucible + water pump + DC12V2A power supply
Type 5: main board + heating ring + 150ml crucible + water pump + DC12V2A power supply + DC48V3000W power supply
Notes for use:
1.Under any circumstances, no-load power-on is not allowed (no-load means no load is connected to the output port). Once no-load power-on will cause the board to emit high-frequency noise, which will cause the MOS tube to be completely damaged and cannot be repaired;
2.You must pay attention when using switching power supply, because high-power switching power supplies generally have a slow-start function, that is, the output voltage rises slowly at the beginning, and if the voltage is turned on before the voltage rises to 11V, the induction heating circuit will be caused by insufficient voltage. As a result, the circuit does not vibrate, so that the two MOS tubes are turned on at the same time and the components are burned. Therefore, it is necessary to connect the induction heating circuit after the switching power supply voltage is stable, and an air switch can be connected between the power supply and the motherboard;
3.This circuit has very strict requirements on the power supply. The 12V power supply must use a power supply greater than 800W, 24V greater than 2000W, 36V greater than 3000W, 48V greater than 5000W (recommended working voltage 48V);
4.No matter it is used under any voltage, as long as the working current is lower than 100A, the circuit will not be burnt out. The alarm current can be set to 100A through the maximum current setting of the power meter. It is inevitable that high-power operation will generate heat, so be sure to do well in heat dissipation.
5.The working voltage must not be lower than 12V。
6.When the heating machine is working, the heating ring will generate a high amount of heat. It is recommended to use water cooling to cool the heating ring to avoid damage to the main board due to high temperature. If possible, use cold water to enter and hot water to drain into the sewer.
7.The power input terminal is marked with a +- sign, do not reverse connection!
8. Do not power on with no load (no load here means that the output is not connected to any load, and it is not regarded as no load if the heating coil is connected and the object is not heated)
Instructions:
1. Connect the wires according to the wiring diagram, check carefully, and don't connect them wrongly.
2. First plug in the 12V2A power supply to AC110V-220V, and observe whether the water pump and fan work normally.
3. If the water pump fan works normally, plug in the DC48V power supply to AC220V, wait for about a few seconds and observe whether the voltage display of the power meter on the main board is about 48V.
4. If the voltage display is normal, first press "Reset/RSET", and then press "On/ON" to turn on the heating. When the green indicator lights up and the power meter has current, it means that the heating is turned on.
5. If you want to turn off the heating, press "Reset/RSET" to turn off the heating, the green indicator light goes out, and the power meter current returns to zero.
6. This heating plate is equipped with overload protection and system water shortage protection. If the water pump is not working properly or there is water shortage in the water pump, the system will automatically protect and cut off the heating, and the red indicator light will be on
7. The maximum current and minimum input voltage can be set for the maximum input voltage and maximum power alarm. For detailed settings, see the attachment, power meter setting method.
8. If the red light turns on and the heating stops during use, first check whether there is water flowing in the water pump. If the water cooling is normal, check whether the maximum current alarm is exceeded. The default maximum alarm current is 100A and the power is 5200W.
9 If a current, voltage or power alarm is generated and the heating is stopped and the heating needs to be restarted after the alarm is removed, you need to press "Reset/RSET" first, and then turn on the heating.
Wiring diagram:
Water pump connection: