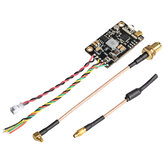
RacerCube Integrated F3 EVO 4 In 1 20A F396 ESC Frsky 8CH PPM/SBUS Receiver for X Racing Frame
US$60.90
A part of the review has been auto-translated.
Very compact setup running on a 210 frame. No issues with radio dropout. Running betaflight 3.0.1 Frsky volatge reading only works for 3s, not 4s. Could not get OSD to display correct battery voltage. or RSSI. ESC only support OneShot125.


Extremely well put together kit of parts. Comes with appropriate nylon screws, nuts, spacers, XT60 connector , silicone wire , heatshrink and the other connectors. The build quality of the boards is high.The receiver pcb appears to me to be a bought in part and the components are not quite so tidily positioned on it as the rest of the kit. Very minor niggle as it is a mini Frysky reciever. I noticed that one terminal was not soldered on mine so (as you should be doing anyway) inspect the parts properly. Maybe it is supposed to be like that but I will trace the tracks and see what legs on the processor are attached to that connection The documentation is sound also. The whole assembly will fit within a 30mm space. Silicone wire on the connectors by the way. I was skeptical of this kit to start with but have warmed to it. Once my build is complete I will review again
Just used the RacerCube in a build. Reversed the ESC board through 180 degrees so that the battery wires exit from the rear, rotated the FC through 90 degrees so that the USB sockets exit from the right side. This requires some adjustments in Cleanflight to accomodate this, but no big issue. One point of note. The pre-wired camera plug was wired incorrectly, the ground and video wires required swapping.

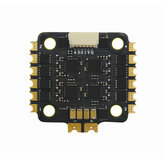
WARNING: THE ESC ORDER IN THE MANUAL IS WRONG FOR CLEANFLIGHT, WITH THE ESC BLOCK FACING FOWARD, (BATTERY TERMINALS FOWARD, POSITE POLARITY IN THE RIGHT HAND, NEGATIVE POLARITY IN THE LEFT. THE ORDER OF THE IS R/H REAR,#1, R/H FOWARD #2, L/H REAR #3, L/H FOWARD #4, CHECK MOTOR ROTATION ONE BY ONE IN CLEAN FLIGH, DO NOT RUN THE MOTORS ALL 4 IN CLEANFLIGHT, JUST ONE BY ONE TO CHECK ROTATION AND ORDER 1,2,3,4, MISSING 4 SMALL INSERS FOR STACK, YOU NEED TO SOLDER 2 WIRES POSITE AND NEGATIVE FROM THE ESC BATTERY TERMINAL TO THE F3 CONTROL BOARD, LEAVE SOME SLACK FOR DISASSEMBLY, NO A EASY PLUG AND PLAY BOARD FOR FIRST TIMERS, WILL POST A VIDEO IN YOU TUBE FOR CLARIFICATION AFTER FINISH WITH MY SETUP.
All work great, can bind with devo 7e and cc2500 module. Telemetry work too. Only the esc cable ar not perfect and need to fix position.


Very happy with this product, only downsize for me was the built-in receiver.... I was able to get a range of 50mtr in open field.... then I had no connection. Even when I was at 5mtrs away from the receiver, the RSSI started to give alarm. That's why I gave 3 stars for the Quality, after all, range is pretty important! I'm using an external receiver now.... and damn, this little thing works great!!!! If it was possible, I would imedeatly order the ESC's seperatly, cause of them you can get a nice clean build!


Hello friend have juste finished to mont this Racer cube test fly tomorrow see you soon

je vais le monter dans un atom 122 ;-) https://www.youtube.com/watch?v=L-p4NgVuBHU

Eccelente


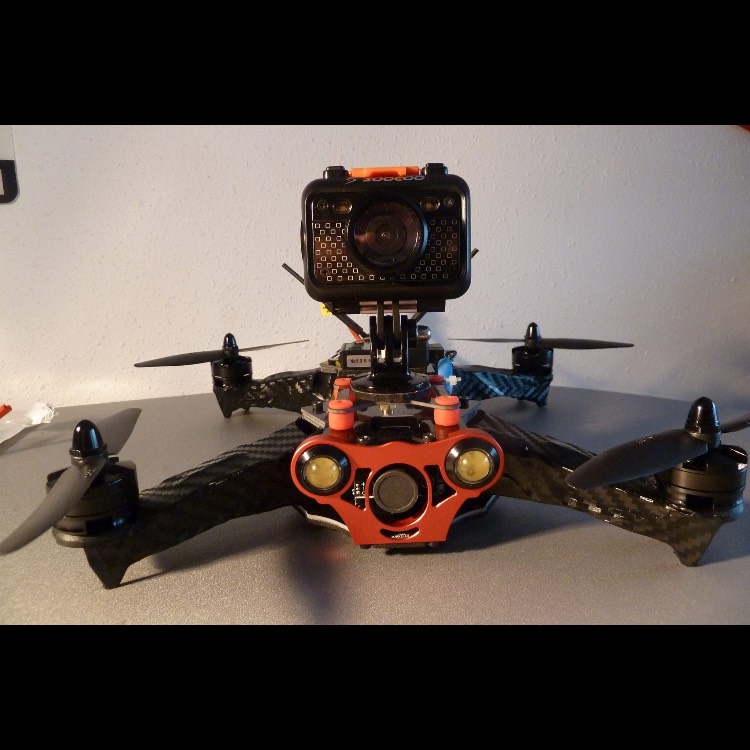
https://youtu.be/annyt8aQdWE I opened the packets included with the Racercube I purchased from Banggood. 3 Boards: 1. FrSky compatible 8 Channel RX 1GB SD Card Buzzer 2. F3 Evo Flight Controller MW-OSD 12V Power Distribution 3. Little Bee 20AMP 4 in one ESC Comments: This looks like it is going to be a great setup. However, there were some things that I had to modify to install this on a 210 sized mini quad. The stack height of the package is quite high. The mini quad frame was made for a 2 board package with the camera mount quite low. I've had to reduce the standoffs between the frame and ESC and ESC and Flight Controller board by 2mm each, giving a height reduction of 4mm overall. Additionally, I had to grind 5mm vertically from the frame. The total is 9mm more vertical clearance with 1-2mm to spare. Pay no attention to the motor markings on the 4-in-one ESC. The numbers do not correspond with the motor layout of Cleanflight. After puzzling about this for a while, I traced the pre-soldered micro plug wires and found that they are correctly soldered to correspond to the correct physical motor layout. The power lead location on the ESC faces forward on the frame which is not ideal for me since I prefer my battery leads and voltage monitor to be on the rear of the craft. Rotating the board 180 degrees will place the female micro connector beyond the reach of the pre-soldered PWM wires/male micro plug. I plan to install the ESC in the standard position and extend the battery cables to the rear of the craft. You will have to power the middle FC board separately, as there is no power pass-through. This becomes an issue since the tiny power pads on the ESC make it difficult to solder to solder both sides if you want to use these pads to power the FC. One side will melt off when you solder the other in this case. For ultra compact X frames 210mm and smaller, you will run into FPV camera clearance when running the standard square housing HS1177 type camera. The SD card impinges on the forward clearance for lowering the FPV camera angle. On my frame, removing the SD card provides enough clearance to almost match the lowest angle of the Go Pro mount. I plan to modify the frame by drilling new camera mount holes diagonally 4mm up and forward. I will continue this build and put up more video on my You Tube channel.
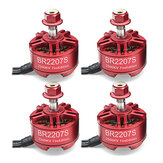
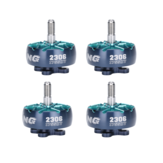
4X Racerstar 2207 BR2207S Fire Edition 2500KV 3-6S Brushless Motor For RC Drone FPV Racing Frame Kit

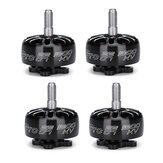
Racerstar 2207 BR2207S Fire Edition 1600KV 2200KV 2500KV 3-6S Brushless Motor For RC Drone Frame Kit

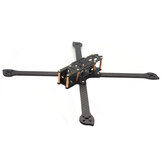
HSKRC XL5/6/7/8/9 232/283/294/360/390mm Carbon Fiber FPV Racing Frame kit for RC Drone
20x20mm HAKRC 25A BLheli_S BB2 2-4S 4 in 1 Brushless ESC Support DShot600 for RC Drone FPV Racing